Friends, in today’s post, how to buy the cheapest hosting from Hostinger is explained “How To Buy Hosting From Hostinger”
As you know, you need a domain and hosting to start your website. Today I will show you How To Buy Hosting From Hostinger. You should know that hosting is very important for any website.
This is because the speed and status of your website depend on your hosting. So whenever you think of creating a site, you need good web hosting for it.
Those who want to start a new blog and continue for a long time. Then you need to use WordPress. Because there are many options for running your blog smoothly.
Therefore, you need to spend some amount of money to buy hosting. Where you don’t have to buy a domain separately because here you get a free domain with hosting. Let’s take a brief look at Hostinger.
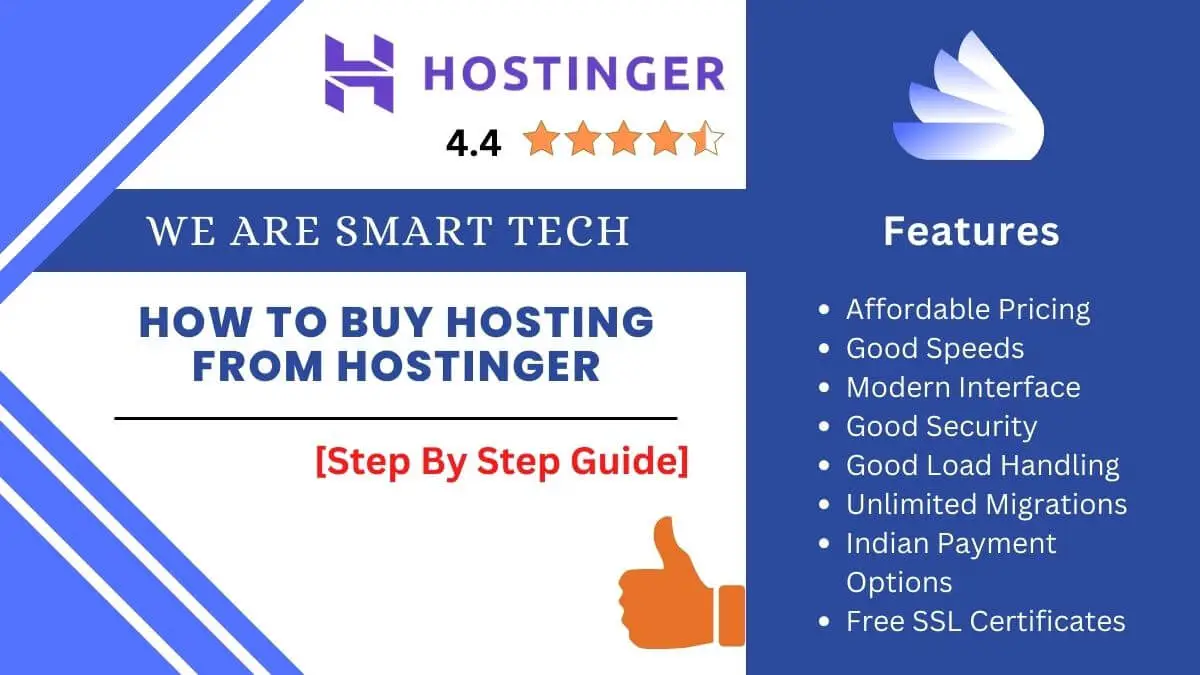
Hostinger is a web hosting company that started as Hosting Media in 2004 but changed its name from Hosting Media to Hostinger after reaching 1 million customers.
This name is very attractive. This has also greatly increased the popularity of the company and Hostinger serves more than 178 countries worldwide.
This results in thousands of users signing up for Hostinger websites daily, making it the fastest-growing web hosting company in 2021.
If you want to read a detailed review of Hostinger then you can read our Hostinger Review article. Here is all the thorough information about Hostinger.
Read Here: Hostinger Review India – Is Hostinger Really Good In 2023?
So in this post, I will not discuss Hostinger in detail. I will only show you How To Buy Hosting From Hostinger. You can read our Hostinger Review India article for details about hosting.
How To Buy Hosting From Hostinger
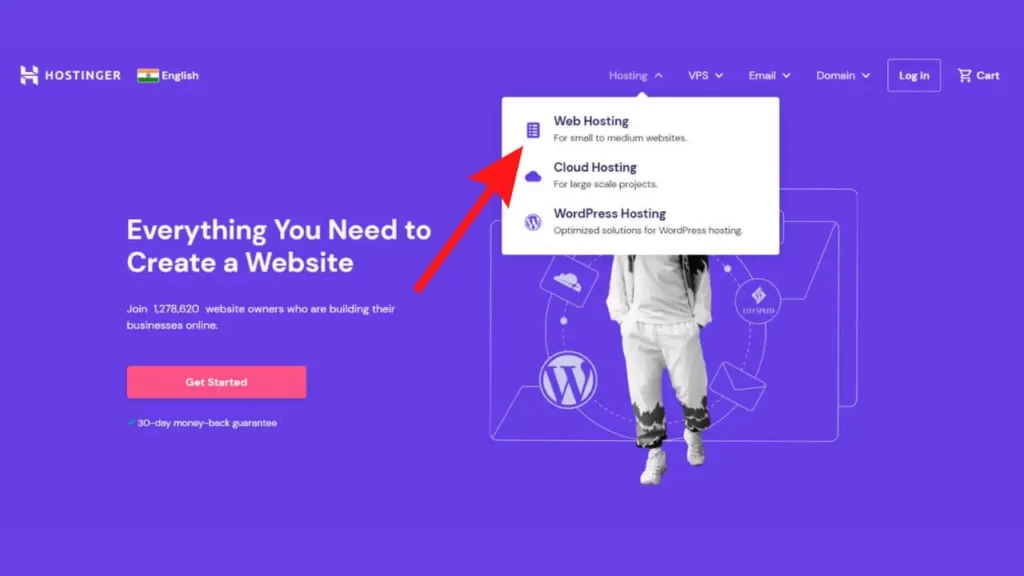
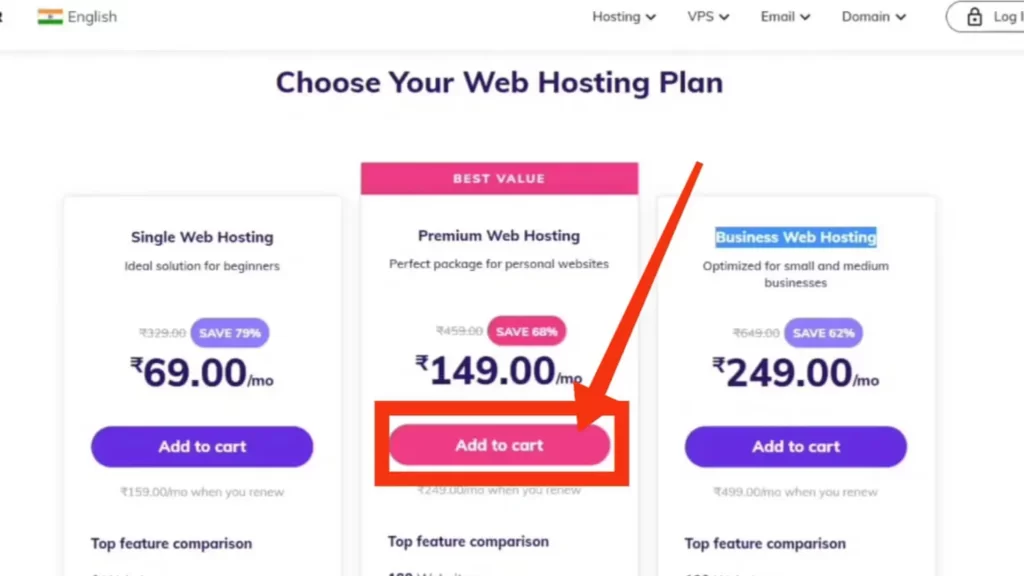
Step 1: To buy web hosting from Hostinger, first of all, click on the Buy Hosting button below.
Step 2: Choose the type of Web Hosting plan you want to buy. If you want to start new blogging, the best web hosting plan is Premium Web Hosting.
In this plan, you will get –
- 25 000 Visits Monthly
- 100 GB SSD Storage
- Free Email
- Unlimited Databases
- Unlimited Bandwidth
- Unlimited Free SSL
- Free Bonuses
- Cloudflare Protected Nameservers
- Weekly Backups
- WordPress Options
- 1 Free Domain
- 24/7/365 Support
- 30 Days Money Back Guarantee
Step 3: You have to click the Add to cart option.
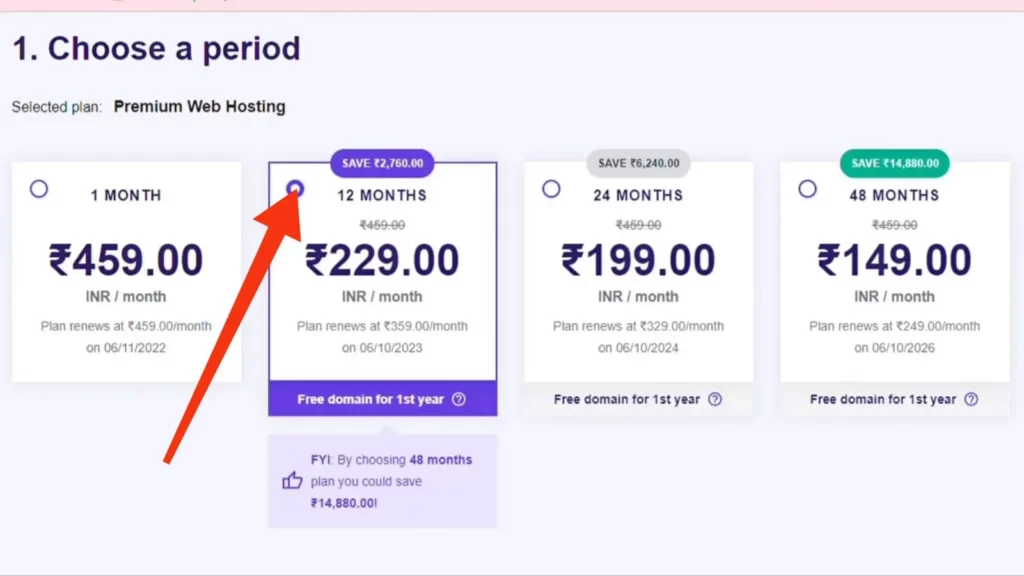
Step 4: Then select the Premium Shared Hosting plan for as long as you want to take it.
Step 5: Enter the Email Adress with which you want to buy hosting. Note that one email ID can be provided for one hosting.
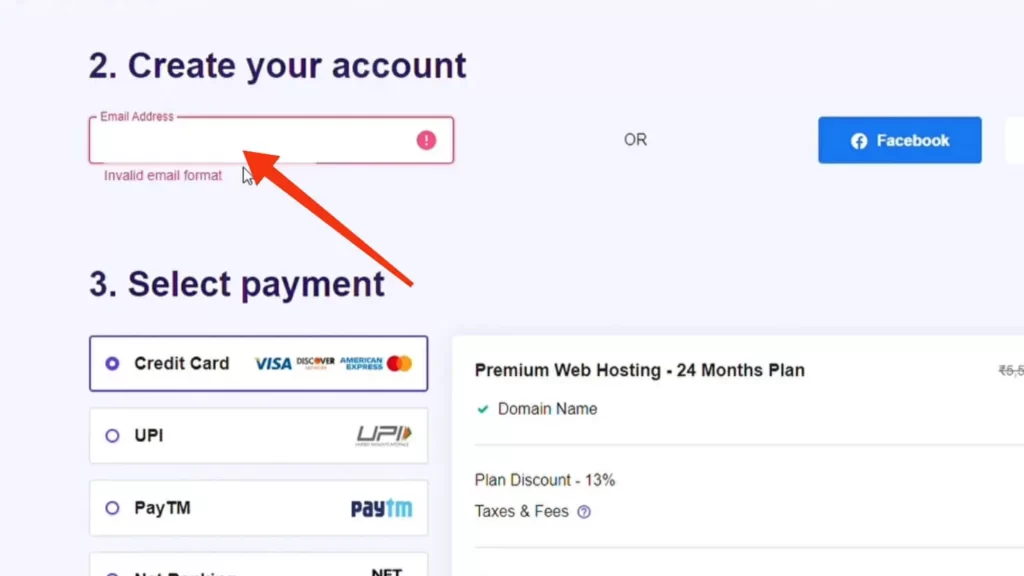
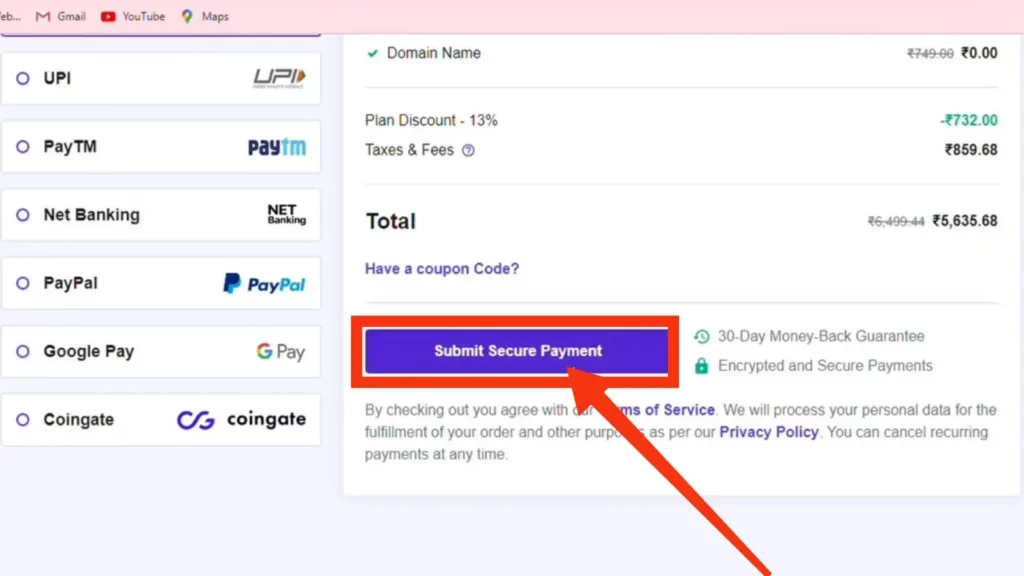
Step 6: Then select the payment method in which you want to pay the money to buy that hosting plan and click on the Submit Secure Payment option.
Step 7: If you want to pay with a debit card then complete your payment by clicking on the pay now option with all details of the debit card like phone number, name on card, card number, expiry date, and CVC code.
Also Read: How To Remove Copyright From Generatepress Theme?
After completing the payment, an email named Payment Received will come from Hostinger to the email you used to purchase the hosting.

Step 8: After making the hosting purchase, click on the Start Now option to set up your hosting.
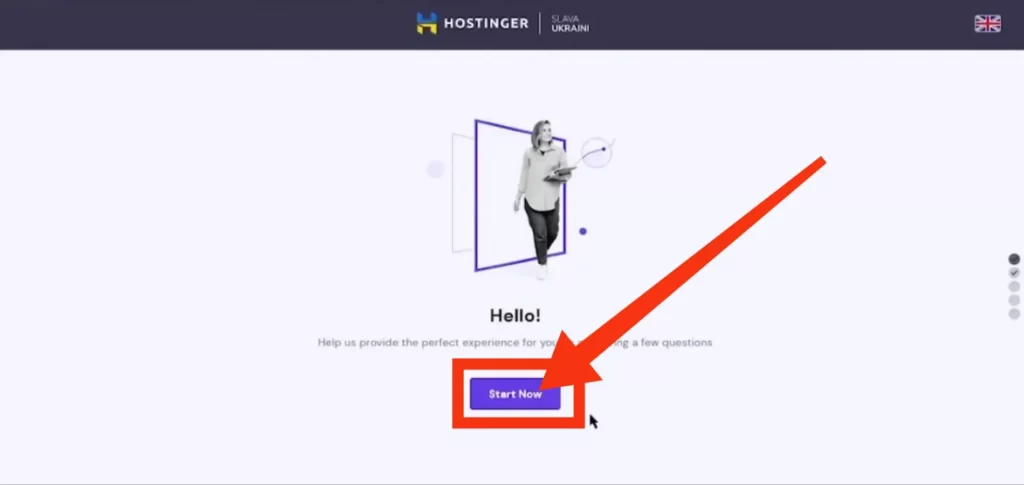
Step 9: Then some questions will come, if you want you can give the answers to those questions, otherwise click on the Skip option.

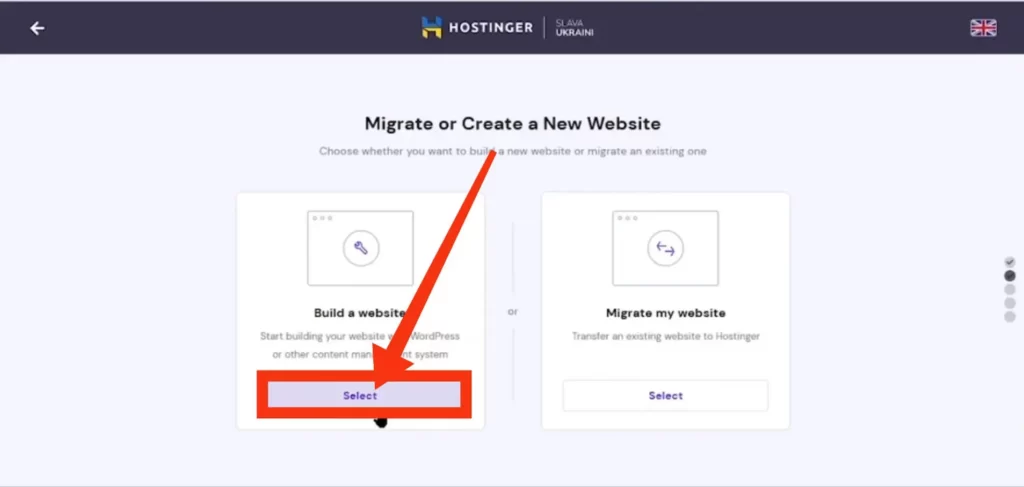
Step 10: After that, you will see two options Build a website and Migrate my website. If you want to create a new website then choose the Build a website option and if you want to migrate one of your existing websites to this hosting click on Migrate my website option.
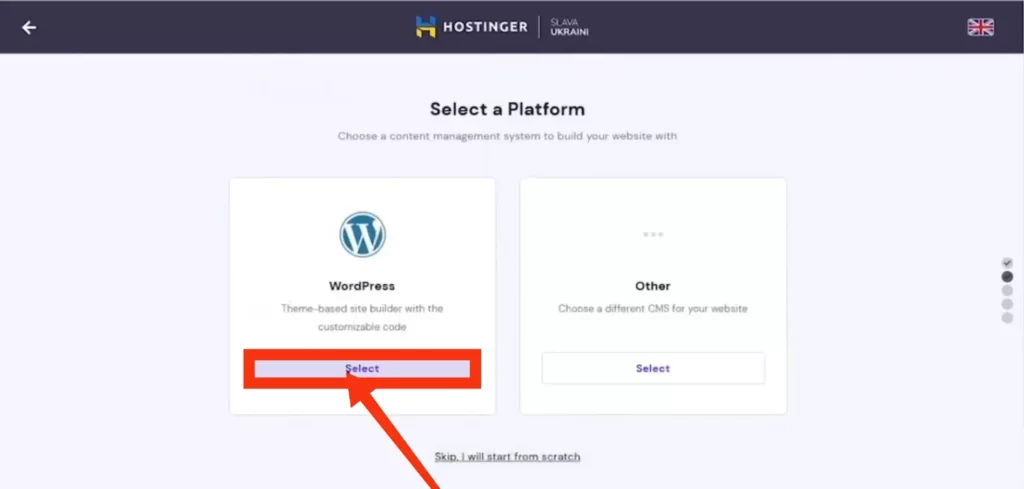
Step 11: Then select the WordPress option.
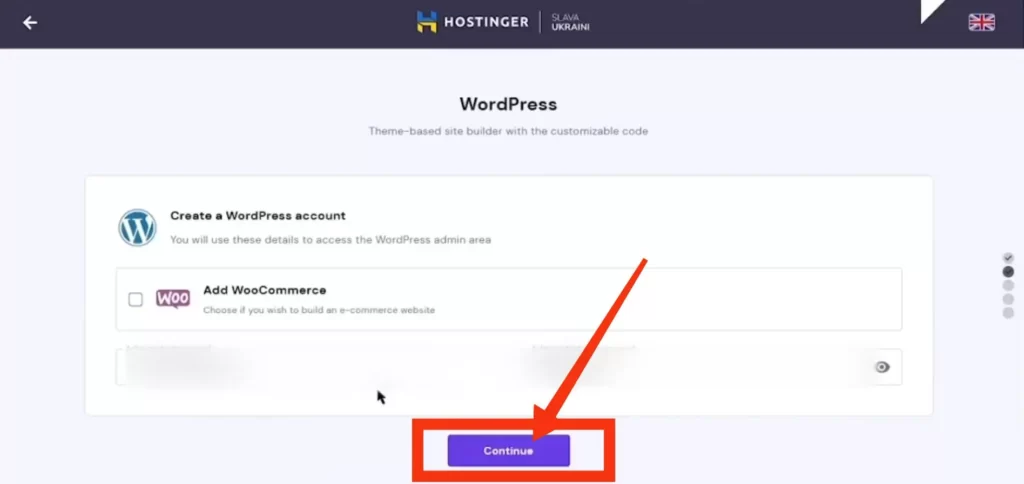
Step 12: Create a WordPress account and click on the Continue option.
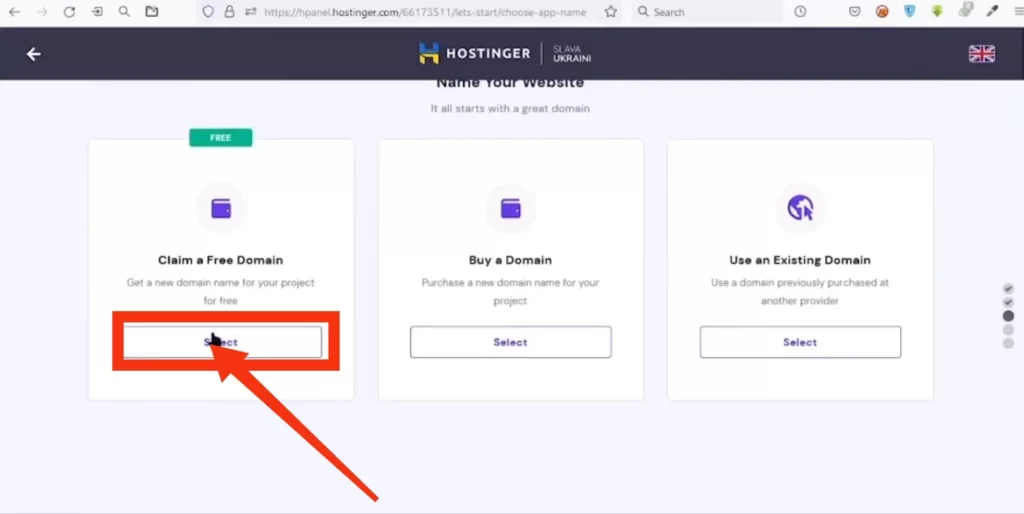
Step 13: With the purchase of web hosting, you will get a free domain. Click on Claim a Free Domain to get it.
Step 14: Select the domain extension you want to take and enter the domain name you want to keep and click on the Search option.
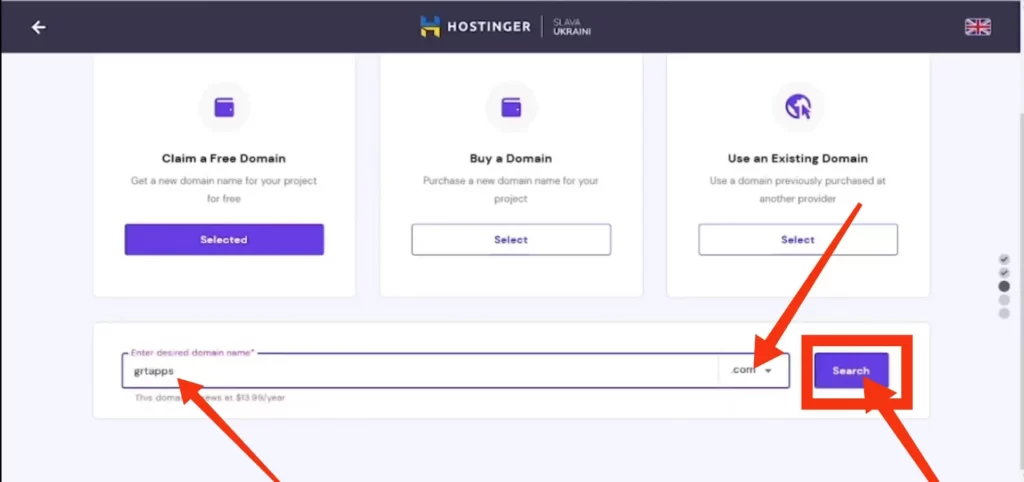
If your domain name is available then it will say the domain is available.
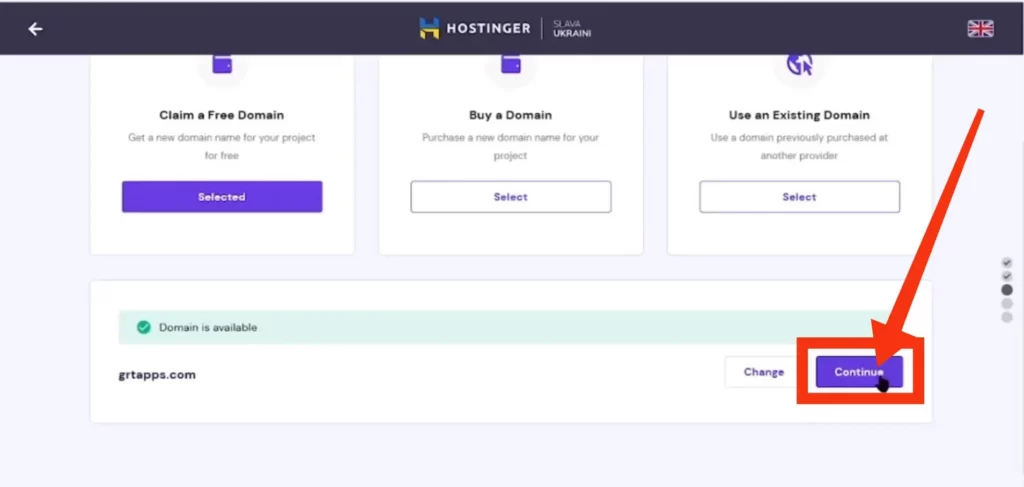
Step 15: Click on the Continue option.
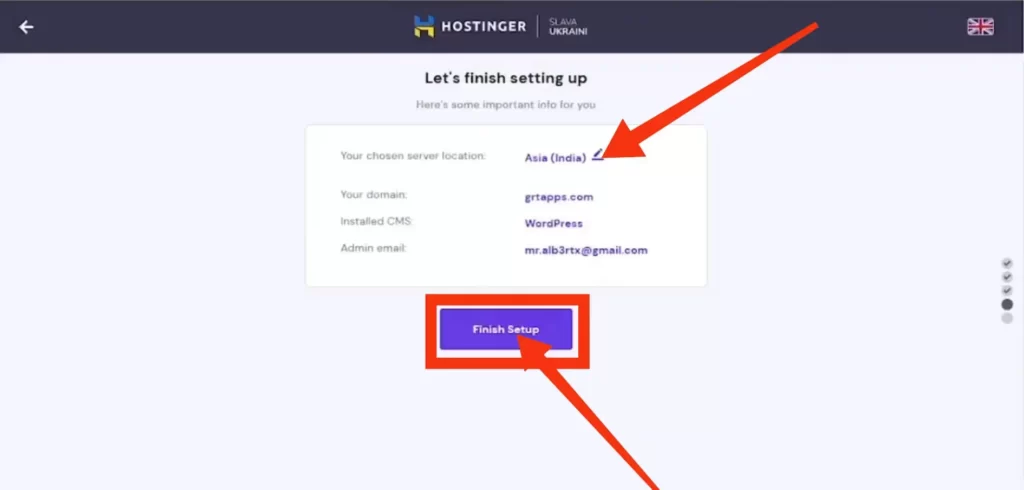
Step 16: Select the server location which is nearest to the location where you want to target the audience of the country and click on the Finish Setup option.
Step 17: Then select your country and click on the Next Step option.
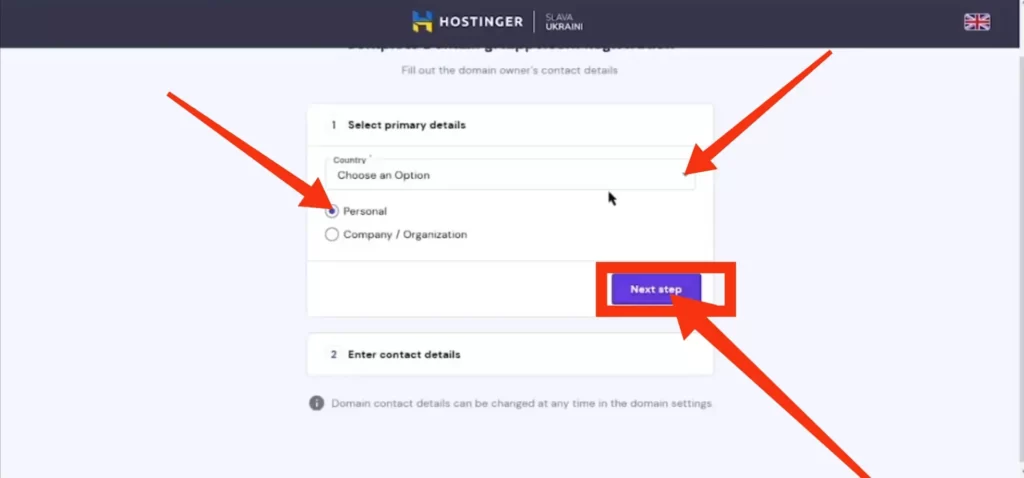
Step 18: Fill in all your personal details here and click on the continue option.
Step 19: Then you created the account on Hostinger with the same email id. A confirmation mail will be sent to that email id. Verify by clicking on the Confirmation Link in that mail.
Then your Hostinger dashboard will open in front of you. A free domain and SSL certificate are provided with hosting when purchasing web hosting from Hostinger.
Step 20: Click on the Install SSL option to install the SSL certificate.
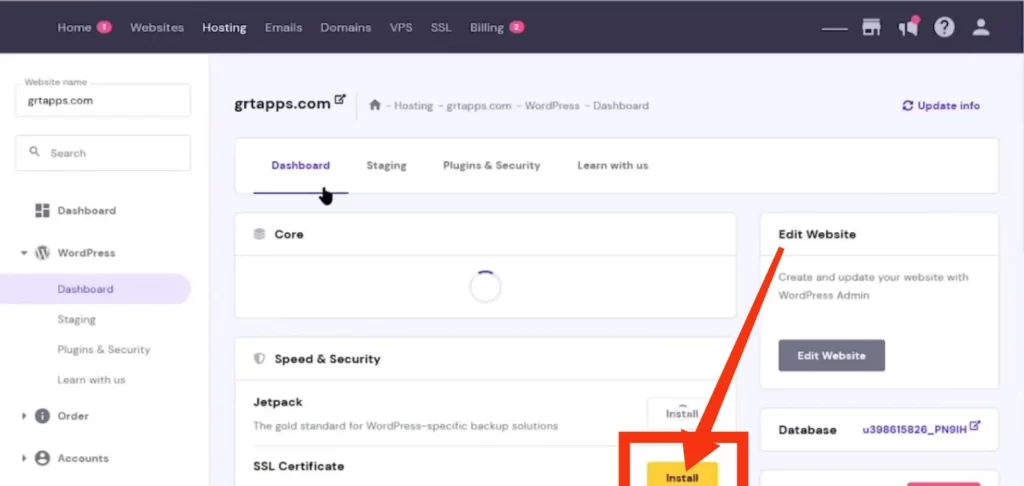
Step 21: After completing all these processes, click on the Edit Website option to go to the WordPress dashboard.
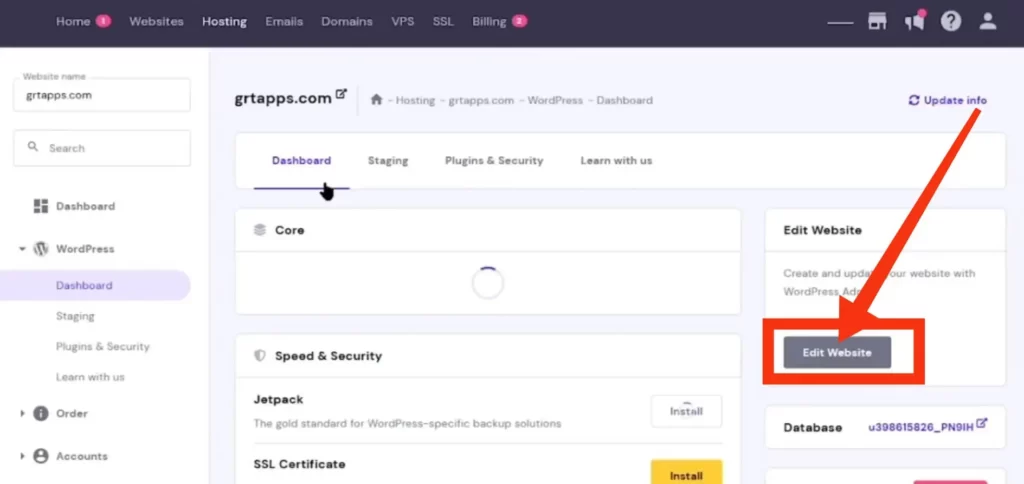
After completing all these processes, click on the edit website option to go to the WordPress dashboard.
Also, to go directly to your website’s WordPress dashboard, search for your website’s URL followed by a forward slash (/) and then wp-admin. For example: https.//yourdomainname/wp-admin
After that, your WordPress dashboard will open and from here you can manage your website.
Conclusion
Thus, you can easily buy hosting from Hostinger. Hope our guide on how to buy hosting from Hostinger and you can start your blogging journey.
I hope this post How To Buy Hosting From Hostinger [Step By Step Guide] must have been good for you. If you have any problems buying hosting from Hostinger, let us know in the comments section.